SHARPENING TECHNIQUES EXPLAINED
Canon EOS 40D - Canon EF-S 17-55mm f/2.8 L IS USM - 17mm 1/200 f5.6 ISO 400
Intermediate level tutorial by Mark
An image can look out of focus when you first start to use a dslr coming from a compact camera, but in fact it isn't (well it could be naturally, but most of the time you take a perfectly sharp image). It just looks less sharp because your trusted little compact had some serious in-camera sharpening while your brand new dslr takes the image in raw (you should set it to raw anyway) and has very little to none in-camera sharpening this way ... hence you will have to perform this step on your own, which automatically means you have a lot more influence on how it is done, so you can select the best way depending on the image you've captured.
When you use PhotoShop to post-process your photographs there are a lot of different ways to actually perform any kind of sharpening on your images, when you take a look at the 'Sharpen' menu you will encounter no less than five options. We will take a deeper look into them, starting with the original 'Sharpen' option right up to the most complex, multi layer methods using channels, in this tutorial we will go over the different ways one by one so you can go for the one that you find gives you the best results on your own images.
First the more regular options listed in the PhotoShop 'Filter > Sharpen' menu :
Filter > Sharpen > Sharpen
 This is the regular filter in PhotoShop, it has been there since the early days and actually works rather well, but today there are more suitable options to get your shots looking tack sharp.
When using this basic technique the image might look sharpen at first glance, but zoom into 100 or 200% and you will start to notice some serious added artifacts to the image, this is something we should avoid at all costs, so personally I never use this filter.
If you take a closer look at the Miura SV image used, you will notice a major difference on the black line along the trunk, the logo looks a lot sharper and the pavement has been altered too, overall it doesn't look to bad however, but most of the time there are other, better options to make your shot look sharper.
Filter > Sharpen > Sharpen edges
 Another option in PhotoShop is to sharpen the edges only, this is a nice option if you have sharply defined differences between the foreground and background colors, this way PhotoShop can easily calculate where the edges in your photograph are located, so the software can apply it's magic onto them. If the difference between the fore and background color isn't large enough this filter will not work perfectly. This filter actually works on the contrast between these two shades, however for most digital images this filter isn't suited, so let's continue onto other and better options.
On this specific image the Sharpen edges filter actually works better than the regular Sharpen filter explained above, again the trunk, air outlets and the logo look better on the sharpened image, but the pavement still looks relatively untouched, which we prefer actually, but there is still room for improvement.
Filter > Sharpen > Sharpen more
 There is another option listed in the Sharpen menu, the 'Sharpen more' actually takes the first option one step further, and in our opinion one step too far, this is a perfect example of going over the top, the image looks way too sharp now, totally artificial and actually useless in this way.
The Sharpen more option isn't much used by professionals because it is just too much, however if you perform this one on a very high resolution image it actually doesn't look too bad, only when used on files destined for the internet it should be avoided at all costs as it ruins your original photograph completely.
Filter > Sharpen > Smart Sharpen > Gaussian blur
 This is probably the most used filter for enhancing the sharpness of an image, however the Smart Sharpen has various settings, which quickly influence the results, this first option is using the 'Remove Gaussian Blur' selection, you can enter the amount and the radius, which are set at 100% and 1.0 respectively.
Try modifying these settings with the preview activated and you'll see some immediate changes on your image, the test shot we've used was very quickly over-sharpened by only using 110% and 2,0 ... so be really careful when using this option, the results can turn bad in a rush.
 We went back to the original image and selected the Smart Sharpen option again, only this time we used these values : Amount = 75% and Radius 0.5 ... which gave a nicely sharp look without going over the top, we could have dialed in a bit more, but that would have given us a more artificial look which we didn't want for this specific shot.
Unfortunately we can't give you the exact values that will work for your images, it all depends on the actual photograph, each one will require a slightly different setting, but the values we've used for this shot could be a nice starting point for your work.
Filter > Sharpen > Smart Sharpen > Lens blur
 The Gaussian Blur removal is just one option of the Smart Sharpen filter, you can also remove the Lens Blur using this filter, and this is where things get really interesting, as the Lens Blur option is a much better way to sharpen your image.
You still have the same settings to put together, the Amount and the Radius, but in this case it works better, and you can really fine tune the results to suit your needs, take a look at the Ferrari image now, using a regular setting of 100% for the Amount and a Radius of 1.0 pixels you already get a very nice image, without those dreadful halo's around the mirrors, and the text has become more readable ... it just looks better this way.
Filter > Sharpen > Smart Sharpen > Motion blur
 The Smart Sharpen actually has a third option called 'Motion Blur' and this one allows you to counteract (to a certain extend naturally) the effects of you not holding the camera perfectly still while pressing the shutter release.
With this option of the Smart Sharpen you can in fact alter the angle of the effect, so you can set it exactly the same as the movement of the camera button during the shot, naturally this isn't easy, and it will take a lot of practice to get right, however remember that most of the time you will move the camera slightly downwards, tilting to the right when pressing the shutter, so you can in fact calculate the angle and do some trial and error to get it right.
There is an option you should set for all three Smart Sharpen option : always use the 'More Accurate' setting when using this filter, it will calculate the sharpening effect more precisely and give a better overall result.
Filter > Sharpen > UnSharp Mask
 The well known UnSharpMask filter from PhotoShop is probably the most used of them all, it is relatively easy to get to work like you want it, and the results are very nice.
However it does take some practice to get right, you do not want to mess up the settings or your image will not look right after all, we usually work with a rather mild setting of Amount=100%, Radius of 1 pixel and a threshold set at 1 level, these settings only apply a minor sharpening, but as you can read further down in this tutorial, you can always repeat the sharpening process a few times, until your are satisfied with the results.
Why should you sharpen your images ?
Sharpening (when done correctly) will bring out details in your shots you hadn't noticed before, like dust particles, or scratches on a body work of a car, a nice sharp image is actually a combination of things. First of all you will need a dslr with a decent amount of pixels, about 10Mpixel should do for most prints up to A4 or Letter size, any larger an you should consider those 15Mpixel or even 20Mpixel Full Frame cameras. But the amount of megapixel on the sensor of your dslr is only one part of the equation, a more important factor is the lens you mount on your body, in the Canon range for instance, those expensive L-lenses are actually worth their money because they focus a lot faster than the 'consumer' lenses, but they also produce much sharper photographs.
 This doesn’t mean that your nice little kit lens can not be used, sure it can, it will only take a bit more post-processing, that's all, if you can cope with the fact of spending more time behind your computer than there is no need to invest in top of the line lenses, if you however would like to limit your computer time to a minimum and spend more time actually taking the shots, you should consider if the premium for these top lenses isn't worth it in the long run.
Another important factor that will have an image 'appear' sharp in the actual contrast in the shot, the more shades of brightness and shadows you see in a shot the sharper it appears to the human eye in fact, all without making the image sharpen in the narrow sense of the word, actually the various filters in PhotoShop play on these settings too.
The trick with applying sharpening in post-processing is to keep it moderate, you will have to decided when enough is enough, and that is most likely just before you think enough is over the top and it actually degrades your shot instead of improving it. Applying too much sharpness will create artifacts and halo's on your image, details and small pixels that shouldn't be present in your shot are called artifacts, the halo's are actually light shaded colors around the edges of your objects in the shots ... both should be avoided at all costs.
 Most dslr these days are able to shoot both in jpg and in raw format, when you are shooting in jpg (which we don't advice anyway) you are actually applying some in-camera sharpening method ... some camera makes are good at this, others are really bad at it, that is why we always shoot in raw and handle the sharpening ourselves in post-processing. There is no way the in-camera sharpening methods will outperform those you can apply in post-processing, even if you can adjust the settings in your camera ... our advice, stay away from jpg in your dslr and stick to raw.
Also keep in mind what your intentions with the image are, will it be printed on high gloss photo paper, will it be published inside a book or magazine or will it become a web image ... all these option require a different approach to the sharpening technique you will apply, anything that gets printed can sustain a much more powerful sharpening than an image that is intended for web publishing. Also perform your sharpening as the last step in your workflow, there is no need to sharpen at image at the full 15Mpixel size when it will finally end up on a website at 800x600 pixels. When you downscale your image you always loose some sharpness, so execute all post-processing on the original size image, when you are happy with the result downscale it and put it on screen in 100% preview, so each pixel you see will correspond with one pixel seen on the web, only then perform your final sharpening technique ... this will get you the best possible results.
Sharpening methods in depth :
the 'old' way :
 it is a bit disrespectful to call this the old way, as it is still regularly used these days. The famous UnSharpMask method within PhotoShop is very powerful and offers several variables you can adjust to create the exact look you are working towards, however it is also very easy to overdo this effect.
Another option within the more recent versions of PhotoShop is the Smart Sharpen filter, especially when using the Lens Blur option, this one will allow you to outperform the USM method easily ... with a bit of practice that is.
Both methods work very well, and we actually still use the good old USM method quite a lot, but the Smart Sharpen method does have some serious advantages on the more challenging photographs, where USM will quickly result in unwanted artifacts and halo's around the more contrast rich areas in the image.
the highpass trick
 This filter is actually a nice little trick we use quite often, it is however very important to execute it on a different layer, so when you've opened your image in PhotoShop duplicate the background layer by pressing Ctrl/Command+J, now we are ready to continue.
The High Pass filter is somewhat hidden away in PhotoShop, you must use the 'Filter' menu and select 'other' from the list, so Filter > Other > High Pass ... will give you a pop up menu that allows you to enter the radius of the filter, we always use a value between 5,0 and 10,0 depending on the effect we envisage for that particular shot, the interior seen here could use some extra sharpness, so we dialed in a value of 10,0.
You might think you've totally ruined the image now, but remember we are working on a layer, so change the blending mode of the layer to 'Overlay' and you will see an extra sharp image appear on your display, most of the time it is a little too much, so we lower the opacity of the layer until it looks just right ... now 'Flatten image' from the 'Layer' menu and you're done.
using the LAB channel
This is probably the most advanced method to add sharpness to your image, and it should only be used if you are feeling really comfortable with your post-processing skills as it involves quite some steps before the photograph is ready.
 The method of LAB sharpening requires you to change the color mode of your shot first by selecting 'Image > Mode > Lab Color', this will effectively change your RGB image into an LAB image, now make sure you are seeing the 'Channels' of your image by selecting 'Windows > Channels' if you don't find them, in this window you will see four sections, the LAB at the top and then one layer for L, A and B, select the L-layer here (for lightness).
Now you'll see some kind of black and white version of your shot, this is actually the lightness layer, perform your UnSharpMask or Smart Sharpen on this layer only, it will enhance the sharpness in your image but it won't increase the noise, so it is an ideal method for those low light shots you've made at a high ISO setting.
Go back to selecting the 'LAB' layer and you will see your color image again, but now nicely sharpened without enhancing any color noise that was present in the photograph ... go back to 'Image > Mode > RGB' to make it an RGB image and you're done.
applying multiple USM filters
 The UnSharpMask method in PhotoShop is often used by us, but we actually don't use it like it was intended, normally you should get the image read, downscale it to the size you need and perform the USM filter on it. We do things differently in our workflow, when we downscale an image from say 10Mpixel to an 800x600 web image we take different steps along the way. We first downscale to about 2500 pixels wide and apply a mild USM setting, then we downscale again to 1280 pixels, again apply the USM and only then we go all the way down to 800 pixels wide ... and apply a final, even more mildly set USM filter over this small image. This technique tends to give the best results when used on the internet.
selective sharpening
This method actually applies to images where you want to sharpen certain sections, but would like not to touch other parts in the crop. For instance when you have a nice 'out of focus' background with the car in front you should only apply sharpening on the vehicle, and not of the background, it is actually quite nice to have a blurry background, it will make the car stand out even better ... so you will have to add a 'sharpen' layer in this case.
 This might sound more difficult than it actually is, just duplicate the background layer (Ctrl/Command-J) and perform your regular sharpening method on this layer, you will see that the car will get better, but unfortunately also the background, which you would like to keep blurry. Now comes the trick, press the Alt key and click the 'add mask' option on your layer palette ... a mask filled with black will be shown next to your 'sharpen' layer. Now select a nice, soft brush that will paint white and start painting over those sections that you would like to return to their original 'unsharp' state, by painting with white you will actually allow the underlying layer to 'appear' in the sharpen layer, this way you can make your blurry background show on your photograph again, but still have a sharpened car in the foreground.
The BOTTOM line
 Sharpening is required on most photographs you will take during your career, some will need some minor extra sharpness, other will require more elaborate techniques during your workflow, but the bottom line is that you will always increase the sharpness in all your shots. Which method and settings to use depends on the object in your composition, we can give you few indications, but you will be required to experiment with them on your own images, there is no simple setting or filter that can be applied to all your pictures.
Correctly applying sharpness to your images will require experience, hence time, to get perfectly right, do not get disappointed when it doesn't work out right from the start, remember your first photographs ? When you compare them with your current work you will notice that you've came a long way ... the same will apply to your post-processing techniques, of which sharpening is probably one of the most important ones.
 |
CPT Premium member BONUS : 46959 If you would like to print this Case Study you can download our special PDF which is optimized for hardcopy layout. We even included the PSD file for some images so you can take a look at our settings. |
Note : commercial use or publishing of our tutorials in any way, written or electronic, is strictly forbidden, we present these for your personal development only. None of our material may be published in any way without prior, written permission from the Car Photography Tutorials founder. All workflows and photographs are copyright protected and owned by the Car Photography Tutorials team unless stated otherwise
Advertisement
Become a MEMBER
Premium Membership
Become a CPT Premium Member and download all our tutorials including a PDF for printing and the result as a PSD file with layers if any.
Interesting articles
Black and white car photography and selective coloring
We take a look at how you can achieve the best results converting car shots into black and white one, we even take a look at selective coloring to put some color back into the image.
Our TOP 10 tips for post processing using PhotoShop
In this tutorial we present you with 10 interesting and quick tips that will make your post processing automotive photographs in PhotoShop a bit easier.
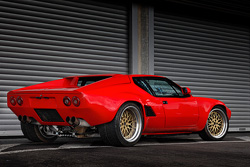
Case study - deTomaso Pantera
I take a reasonably good shot and put it through some extensive post processing to create a photograph

Must have base equipment
In this article we talk you through the large amount of camera's you could buy to get started well in automotive photography.
Off camera flash car photography, part 1 of 2 : the shopping list
In this first part of the off camera flash tutorial I take you over the required equipment to get started using additional light sources.
Keep up with CarPhotoTutorials
Why not follow us, become a fan, get our RSS feed or mail a link to a friend ?
![]()
![]()
![]()